Nowadays, it is perfectly normal to find ceiling fans that have lights attached to their base. This way, not only are you enjoying the energy-efficient cooling system, but you are also enjoying illumination with one product.
Even in cases where a ceiling fan does not come with lights, it is usually designed in such a way that a light kit can be attached to it.
Ceiling fans with light kits can be controlled with one switch or more. When there is only one wall switch in the room, it is typical that it is that switch that controls both the fan and the light functions.
However, when there are separate switches, you can seamlessly control the flow of power to the fan with one switch, and the flow of power to the light with the other switch.
In this article, we will be considering how to wire a ceiling fan and light kit in a room with two switches. First, let us consider the benefit of using separate switches for a ceiling fan and light kit.

The Benefit Of Using Separate Switches
Wiring your ceiling fan and fan light such that the two can be controlled independently has a major benefit that has to do with the reduction of power consumption. Here is how it plays out…
Most ceiling fans with a light kit usually have multiple bulbs attached. Once the flip is switched, they all give a super-bright shine, which is most times unnecessary for your room. If both the ceiling fan and fan light are controlled with one wall switch, there is nothing you can do about reducing the light’s brightness.
However, when the light has been configured to be controlled with a separate switch, you can decide to employ the use of a dimmer switch to reduce the intensity of the light.
In this way, you will be getting the exact amount of light you need at any point in time, thereby, reducing the amount of energy the light consumes.
Let us quickly move to how this wiring can be achieved.
Tools Needed
To carry out this wiring, certain tools will need to be at hand. This is of course, after getting the ceiling fan with a light fixture to be installed. The basic tools include the following:
1. A Step Ladder
To get your wiring done, you will need to get as close to the ceiling as possible, so, some form of elevation will be required. Get a step ladder to offer this elevation.
If you are unable to get one, improvise by piling some sturdy boxes together to serve as elevation for you. Even if you are very tall, getting on an elevated surface will give you a better ease-of-access.
2. Screwdrivers
You will need to get screws undone or get them tightened when needed. The type of screwdriver you will need will depend largely on what type of screws you are working with.
Getting a Philip head screwdriver and a flat screwdriver should take care of your screwdriver needs for this wiring project.
3. A Wire Stripper
A wire stripper will be needful for getting the rubber ends off wires to enable you to connect the appropriate ones to get current flowing through them.
You might argue that a razor or knife can get the job done. We agree. However, the stripper will get the job in a neater and faster manner.

4. A Pair Of Protective Gloves
With the wire ends stripped, you can choose to wear a pair of protective gloves to prevent yourself from sustaining any cuts from the copper ends of the wires.
5. Wire Nuts
When you twist the wires together to create a connection, you will need to secure them so that they do not slip out of place. This is where wire nuts or wire caps come in. You only need to twist them over the wire ends to hold them in place.
6. A Non-contact Voltage Tester
This will be used to check for power in exposed wires. It is majorly used so that you do not unknowingly expose yourself to the hazardous situation of coming in contact with a hot wire.

The Process
After confirming that you have the right tools, you can go ahead to start the wiring and installation. But first, you need to ensure that your work area is hazard-free.
1. Turn Off The Power
You will need to do this from the circuit breaker and not simply at a wall switch. You need to ensure that there is no power running anyway in your ceiling.
You do not want to get zapped. And we do not want you to get zapped either. Our mantra is “Safety, first!” Just to be on the safe side, after turning off the power at the circuit breaker, flip the wall switches to the “On” positions.
Then place the tip of your non-contact voltage tester on any exposed wire tips coming from your ceiling to confirm that no current is flowing through the wires.
Usually, when there is electricity is flowing through the wire, the tester will flash an indicator light, and sometimes a buzz will be heard.
2. Take Note Of The Exposed Wires
Before you proceed, take note of the various wires you need to work with. There are two sets of exposed wires at this point. They are the wires coming from the ceiling, and the wires coming from the fan.
From the ceiling, you will find a white wire, which is the neutral wire, a black wire that powers the ceiling fan, a red or blue wire that powers the fan light, and a copper or green wire that is the ground wire.
Wires that hold an electrical charge are called the hot wires. In this case, the red wire and the black wire are the hot wires. The two hot wires are connected to two different switches.
The wires from the fan should be identical to the ones coming from the ceiling. However, the fan comes with two green ground wires, while one is found in the fan, the other is attached to the ceiling bracket.
3. Install The Ceiling Fan Bracket
The ceiling bracket is the part of the fan that lays closest to the ceiling. The fan’s structure, when erected, usually hides this part of the fan.
You will need to follow the manufacturer’s instructions to carefully carry out the fan installation and wiring. First, secure the ceiling fan bracket to the ceiling using screws with the aid of a screwdriver.
Ensure that you feed the wires coming from the ceiling through the center hole in the bracket. Use the screwdriver to ensure that the screws are tight so that your fan does not wobble when it gets turned on at the end of the day.
4. Get The Fan To The Ceiling Bracket
Assemble the fan’s components following the instructions in the product manual. Then, get the fan to the ceiling bracket.
Hanging it on the bracket will give you the allowance to carry out the wiring and installation. Irrespective of the model of the fan, modern ceiling fans are designed to provide this support.
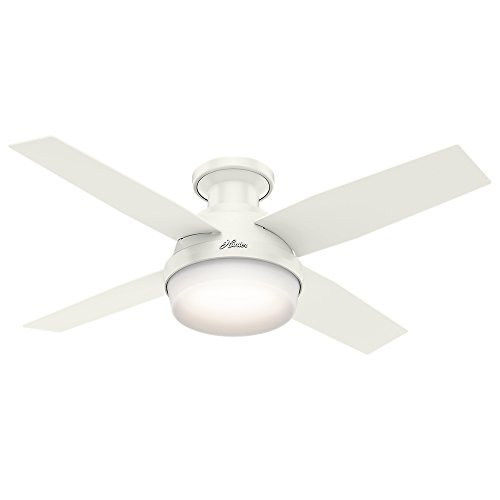
- CONTEMPORARY CEILING FAN: The modern Dempsey fan comes with LED light covered by cased white glass that will keep home interior current and inspired; Measures 44 x 44 x 11.03 Inch
- MULTI-SPEED REVERSIBLE FAN MOTOR: Whisper Wind motor delivers ultra-powerful airflow with quiet performance; Change the direction from downdraft mode during the summer to updraft mode during the winter
- LED LIGHT KIT: Energy-efficient dimmable LED light bulbs let you control the lighting and ambiance of the living space; The long lasting bulbs have longer lifespan than traditional bulbs
- UNIVERSAL HANDHELD REMOTE: Adjust the brightness of light and speed of the white ceiling fan with ease from anywhere in the room
- ROOM PLACEMENT: Indoor fan is designed to be used in rooms with low ceilings, the low-profile housing fits flush to the ceiling; Ideal fan for living room, lounge, bedroom, childrens room and nursery
Prices pulled from the Amazon Product Advertising API on:
Product prices and availability are accurate as of the date/time indicated and are subject to change. Any price and availability information displayed on [relevant Amazon Site(s), as applicable] at the time of purchase will apply to the purchase of this product.
5. Connect The Different Sets Of Wires
This is the most important part of this installation, as the effectiveness of this process will determine whether your fan with its light works well from the two switches.
The first thing to be done is to use the wire stripper to get rid of the rubber, thus exposing the copper ends of the wires.
Stripping the ends up to two inches is adequate. Please, note that this has to be done to the wires coming from the ceiling and the ones from the fan. However, if this has already been done, then you can just go on with the other steps.
To create a safe electrical connection, the wires have to be matched uniformly.
i. Connect The Neutral Wires
The white neutral wire from the ceiling should be connected with the neutral from the fan. Simply twist the copper ends together and secure them in a wire nut.
ii. Connect The Ground Wires
The copper ends of the green wire attached to the fan should be connected with the green wire attached to the ceiling bracket. It is the two green ground wires you just connected that will prevent any damage to your fan in the event of a power surge.
Next, connect the two green wires to the ground wire coming from the ceiling, which is usually copper or green in color.
Twisting the ends of these ground wires together will keep the internal components of your fan grounded. Endeavor to secure the wire connection using a nut.
iii. Connect The Hot Wires
Remember that we had earlier said that two of the wires are called hot wires because they are the ones that hold the electric charge. The last set of wires to be connected are the hot wires.
Twist the copper ends of the red or blue wire coming from the fan with the red wire coming from the ceiling. This takes care of the fan light connection.
Then, get the black wire coming from the fan attached to the black wire coming from the ceiling to take care of the fan connection.
These separate connections are necessary because the switches are going to control the light fixture and the fan separately.
If we were connecting them to just one switch, we would have only needed to connect the red or blue and black wires from the fan to the black wire from the ceiling. Be sure to place wire nuts on the separate connections so that the wires do not touch each other.
6. Secure The Ceiling Bracket To The Ceiling
Having confirmed that all the electrical connections have been secured in wire nuts, you need to tuck the wires neatly in the ceiling fan bracket. This is needed to enable you correctly attach the fan canopy to the ceiling bracket.
7. Complete The Installation Of The Fan Assembly
With the wires tucked into the ceiling, secure the fan canopy to the ceiling fan bracket. You can achieve this by simply pushing the fan canopy against the bracket. The base will typically pop into place without your having to use screws.
However, if it does not turn out that way, you can use some screws to secure it in place, as long as the screws lie very close to the ceiling. If the fan canopy is not attached securely, there is no guarantee that it will stay stable once the fan is turned on and in motion.

8. Attach The Fan Blades
If you had not already attached the fan blades before taking the fan up, now is a good time to do it. Following the directions contained in the product manual should get this taken care of.
What you need to do is to slide the fan blades into their respective brackets and then, screw them to secure them. The number of screws used will depend largely on the model of fan you are installing. Ensure that the fan blades are well balanced so that they do not wobble when the fan is in motion.
9. Attach the Light Bulbs
Screw in the light bulbs to the light sockets found on the kit. Ensure that the bulbs are secured by turning them in the socket till they are unable to turn anymore.
10. Turn On The Power
With everything fitted properly, there is nothing left than to test your wiring and installation. Turn on the power by flipping the switch at your circuit breaker. Then, turn on the first wall switch to confirm which switch controls the fan or light.
If the flip of one switch turns on the ceiling fan, then the second switch when flipped should turn on the ceiling fan light, and vice versa.
If you followed our step-by-step guidelines, both your ceiling fan and the light should be working just fine. So, enjoy them.
Final Words
We have tried to offer clear guidelines in this article. However, we advise that you also refer to the product manual to familiarize yourself with the safety code as regards the particular electrical product you are working with. Safety should be your priority.